Hello, dear readers of the blog site. Any activity on the Internet presupposes the presence of certain modern means of communication. Among them, email occupies far from the last place, including the free email service GMail, which the majority of network users rightfully consider the best.
Among the big advantages of Jimail, undoubtedly, one can name the means of combating it in its functionality. It is thanks to this circumstance that all my correspondence, for example, from Yahoo Mail, Mail.ru and other places, flows here.
Another important advantage that Google email has is a high level of security, including a secure protocol, the presence of two-step authentication with the ability to choose a confirmation method, a set of reliable tools for restoring lost access to an email account, and other similar features.
There is another important aspect, namely competitiveness, which directly affects the choice of users. So, in the global market, Google Mail is almost neck and neck with another well-known brand, Outlook (formerly Hotmail), but in RuNet it has serious competition, which also has a number of advantages.
If we note the main functionality, then into Google Mail you can import contacts from third-party services, sort correspondence in a variety of ways, mark letters with labels, send them on a schedule, apply various actions to incoming and other messages, use Hangouts chats and perform a bunch of other useful operations.
Of course, nothing is ideal in the world. It is possible that Jimail has significant disadvantages, but they are obvious, rather, for advanced users who use the functionality to the maximum, activating features that ordinary users have no idea about.
But I assume not to go too deep into the weeds, and therefore only small flaws are visible that “do not affect the speed.” However, this is pure subjectivism, which you can easily dilute with “collective objective” in the comments (you’re welcome).
Registration and creation of a Gmail mailbox
So, before you get all the functionality of free email from Google, you need to register an account and create your own email account. Probably for beginners, it should be said that by registering for free with Mail, you simultaneously gain access to other Google services, similar to .
I recommend that you first go to to the GMail introductory page, where you have the opportunity to briefly explore the main benefits offered by the service. From here you can log into your account, and therefore into your mailbox (if you already have one).
In addition, here is a link to a special web page for creating corporate mail for business(I note that this pleasure is paid, as you get additional specialized tools), if you feel the need to create it:

Well, if you don’t have your own email account yet, but passionately want to get it, and for free, in the standard version, then you need to click on the button "Create an account", after which you will be redirected to the registration page (https://accounts.google.com/SignUp) for a general Google account, where you need to fill out a standard form:

True, it is often quite difficult to come up with a nice user name, which in the future will serve as a login for logging into all Google services, as well as the first component of an email address (the second part “@gmail.com” is the same for everyone), since this service is super popular, which means many options are already taken.
However, imagination, even under these conditions, can suggest a completely acceptable option. In the end, you can always use, for example, the domain name of your site as a username, if, of course, you have one.
Separately, it should be said about the importance of using a complex password, since this is one of the most important points in protecting your account from attacks from outside. Of course, the security of the Gmail service is high (we’ll talk about this later), but why give attackers an extra chance.
Many users create a password based on considerations to make it easier to remember, and include simple combinations using their date of birth, name, etc. This is completely false and can lead to your account being hacked by third parties. Therefore, always use high-complexity passwords, and use high-quality third-party software to store them. For my part, I can recommend, which can not only store and generate passwords, but also automatically fill out site authorization forms.
During the registration process, at one of the steps you will be asked to provide a phone number and a backup email address (this is necessary in order to enhance security and restore access to your email in case it is lost). True, at this stage this is not necessary (so you can easily create an email without a phone number by simply skipping this step), since you can perform the same actions at any time in your account settings if the need arises.
However, if you still decide to do this immediately, then enter your mobile phone number and click “Submit”. Next, wait for an SMS containing a six-digit verification code, which you should enter in the appropriate field and use the “Confirm” button:

Next, you will be asked to determine when the system should use your mobile phone number. You can immediately mark the desired item or do nothing for now if you decide to add these settings later. If you remember that you missed some information or need to make certain changes to the registration form, you can use the “Back” button. Otherwise, click “Done”:

Next, by checking the appropriate boxes, you agree to the terms of use of the Google email service and the processing of personal data and using the “Create an account” button, you are moved to a freshly created account, where an electronic guide awaits you, which will give simple tips on getting started.
From the same Google Mile start page you can download applications (from Google Play and App Store) for all your mobile devices, running on Android and iOS. This gives you excellent access to your email at any time and anywhere.
");">
How to log into Jimail mail on "My Page"
You can log into your email account (by analogy with other major services, your account in this case can be associated with terms such as “My page” or “personal account”) after registration, you can from the web page of any Google service, since the created account will be common to all of them. To do this, select the appropriate icon from the drop-down menu in the upper right corner:

Implement Login to Google Mail you can go to each time this link. However, there is an important nuance here. If, then you will be taken to the already mentioned Gmail page and after clicking on the “Login” button there, you will be redirected to a web page with an authorization form, in which you are required to enter your login and password in sequence:

Google provides users with an easy way to log into their email account. Therefore, if you have already implemented logging in and out of your account, but the cache was not cleared after that, you will immediately be taken to a page with an already filled email (login):

From here you can enter your password and log into your account. But there is an alternative. The fact is that Google, like, by the way, Yandex, does not limit the number of accounts created. Therefore, when you click on the bird in the login field, you will be taken to the account change window:

After clicking on the appropriate link, a standard authorization window will open in front of you to log into another GMail account (if you already have one). If you want to register a new mailbox from there, then this can be done without problems.
How to log into several Google Mail mailboxes at once
Now let's see how Google makes it easier to switch to any email account while maintaining multiple entry option into several boxes at once and work with them simultaneously, allowing you to significantly save time and not make unnecessary movements.
Congenial, isn't it? So, let's say you have registered two or more accounts on Jimail for different purposes, but are not currently authorized in them, and the browser cache has not been cleared. Then if you follow the link:
https://mail.google.com/
You will be redirected to a page listing all your email addresses:

You can select any mailbox by clicking on its login and log in by entering the appropriate password. But that's not all. As I said, you can log into multiple email accounts at once directly from the account you are currently logged into. This can be done from the upper right corner of the interface by clicking on the avatar:

In this simple way, you can open as many different email accounts as you like and move seamlessly between them, since each time they open in a new tab by default. This is certainly one of the exclusive features of the Google Mail service.
"My Page" interface and initial settings
When you log in to your account, the system loads by default full version of Google Mail, but if the Internet connection is not powerful enough, the interface can be provided in a lightweight HTML version. If necessary, you can switch to the HTML version yourself (another plus for this email service; in the text of the publication you will find many more such pluses):

When you first visit your account (“My Page”), you will find a message from the GMail team, which gives the most necessary recommendations for increasing the security of your account, a proposal for installing mobile mail applications for Android and iOS, as well as useful links to the thematic Forum and help page .
In addition, in the foreground you will see icons with which you can easily and quickly perform the necessary actions, including the initial setup of the mailbox (and again, a portion of water for the Jimail mill). The interface itself looks like this:

If you have created an account for correspondence at a serious level, then for your identification you can first upload a photo or avatar for your profile(although in any case this will be useful, because people are reluctant to communicate with impersonal persons).
To do this, click on the default icon in the upper right corner of the interface and upload a suitable image from your computer (this can be done by simply dragging the graphic file into the upload area, which will appear after clicking on the icon):

Selecting the interface type and theme

Interface view is installed from the three options presented here. For me, the default option is the most optimal, but everyone may have their own opinion on this matter based on their own ideas about convenience and personal preferences:

Choosing a theme seems to me to be an even more subjective matter. But there is a choice here too:

If you don’t like anything in this collection, you can click on the “My Photos” button and select as a design theme one of your images located on the Google Photos service, which you can first upload there.
For those who, in addition to my author’s exercises, would like to see instructions for setting up a Google mail account in video format, I present an informative video demonstrating 15 useful gadgets available in the service’s functionality:
");">
Well, for everyone who wants, I will allow myself to continue the story, during which I will draw your attention to some more secret features that are missing in this video review.
Security of work in a Gmail account
The security capabilities provided by the system are impressive, so as a first step after registration, be sure to take the time to properly protect your mail, this will help you avoid a lot of troubles in the future.
All these settings (including two-step authentication to log into your account), which are carried out on security page, I described in detail in the publication about, so it makes no sense to repeat.
In addition to the option to confirm your login to Gmail (and therefore to all other Google services), using your mobile phone, here you can change the password if necessary, specify a backup email address, block access for unverified and unreliable applications, and also take other actions to strengthen the level security of your account.
Perhaps I’ll point out one more important detail in terms of security, since it is directly related to the mailbox interface. This is a link "Additional Information", located at the very bottom right, after clicking on it the following window will open:

If necessary you can end open sessions for this account on all devices by clicking on the appropriate button, if such a situation occurs (this will be the next big step towards improving security).
In the sign present here you can see the latest actions performed in this account, indicating the location ().
If, while studying this information, you noted some unfamiliar device (for example, instead of the browser from which you are logging in, another application will be listed) or IP, then this is a reason to worry, as a result, immediately change the password to be sure, and even then carefully study the recommendations from the Jimail service for protecting your account.
How to set up your email account in the GMail service
Next, let's move on to the basic settings that will help you optimize your Google Mail account to the maximum, taking into account all the features of your activities on the Internet. Let's start by putting things in order in the mailbox and organizing its contents.
Shortcuts (folders) in Google Mail
For the orderly distribution of correspondence, the system contains shortcuts that essentially act as folders where letters are placed depending on the nature of their content and purpose. Let's take a closer look at this.
There are system shortcuts(“Inbox”, “Flagged”, “Pending”, “Important”, “Sent”, “Drafts”), various categories(“Social networks”, “Alerts”, “Forums”, “Promotions”), as well as simply shortcuts(“Personal”, “Travel”, “Work”, “Bills”). Their names speak for themselves. In my opinion, the developers have provided almost all the necessary parameters according to which the correspondence of a standard user can be distributed.
If you open the corresponding tab in the settings ( Gear symbol - Settings), then you can set the set of shortcuts you need, which will be shown in the active list in the left column. For some of them, you can configure their display when one or another specific condition is met (“yes, if there are unread ones”):

If desired, some shortcuts can be deactivated, in which case they will simply be hidden in the drop-down menu "More", whose name is converted to "Collapse" when it opens:

I have already said that Google Mail provides shortcuts for all occasions, but if you want to contribute to the systematization of correspondence, you can create your own, edit existing standard shortcuts, or delete them altogether (however, it should be noted that system shortcuts and categories cannot be deleted or changed):

When editing or adding your own shortcut, you can perform almost the same actions: enter its name and select a parent element for it. Let me give you a clear example. Let's say you have created a mailbox in Google Mail, including for business correspondence. Then you can create the appropriate section and place subsections in it:

Shortcuts created in this way will appear in the list of others on the left side of the interface. But this is not all the actions that can be applied to them. For example, if you move the cursor to the name of any custom shortcut and click on the button with three dots that appears to bring up the context menu, you can, for example, add a color to the adjacent tags(as well as perform other operations):

You can color-code specific incoming messages yourself by simply dragging them from the left menu:

In this way, you can scatter all your existing mail correspondence into pre-created user and system labels, providing each of them with the necessary label, which will provide you with maximum order in your mail account. In the future, the system itself will automatically determine the corresponding chains of letters related to the same topic and place them in those folders that meet the criteria you selected in the form of labels.
Setting up your inbox
Now let's try to consider the options for the most important folder of any mail service, which in most cases contains a list of all received letters. To do this, go to the settings again through the gear drop-down menu:

Almost everything is clear here, I will just briefly introduce the options here and dwell in more detail on some of the nuances that may raise questions for beginners:
1. "Inbox type"- this is the distribution of letters in order from top to bottom (important, unread, flagged, priority first). By default, the mode is in which all messages are sequenced in time (newest first). Naturally, in the vast majority of cases this is quite satisfactory for the standard user. If you have your own reasons, you can select the option that suits you from the drop-down list.
2. "Categories"- you can set the sections that will be present in the “Inbox”, since all correspondence based on Google Mail analysis can be sorted into five categories (“Unsorted”, “Social networks”, “Alerts”, “Forums”, “Promotions”), which , again, important from a systematization point of view, but by default there are three of them displayed:

If you wish, you can reduce or increase the number of categories (sections) displayed in the Inbox folder by checking/unchecking the boxes next to the ones you need.
3. "Markers of importance"— the Google Mail system analyzes incoming messages and, when determining their importance, takes into account the actions you perform and other parameters. If the letter meets the required criteria, then it is automatically marked with this marker (I think it would be wise to leave this option enabled in the settings):

4. Filters— I hope to convince you of the importance of using filtering just below, so I recommend not to ignore this part of the functionality, which is activated by default (see the third screenshot up from here).
This part of the publication has come to an end. I hope that you got some useful information from it. Below we will continue the conversation about noteworthy features.
How to Import Mail and Contacts into GMail
Google Mail has such a wide functionality that, it seems to me, there is a place in it to solve any problems. Therefore, the idea of finally moving to this wonderful service with all the accumulated contacts and mail correspondence seems very, very successful.
You can import contact information and existing mail from your mailboxes (including those on third-party services) from the same settings in the tab "Accounts and import":

Importing mail and contacts possible with a huge number of postal services. To activate the operation, click the appropriate link, as a result of which a message window will appear in which you will be asked to indicate the e-mail of the mailbox from which you are going to import mail, and then enter the password for it. The next step will require you to clarify the components of the transfer:

It should be noted that this operation will make it possible to transfer all letters collected at the moment, but will not allow receiving correspondence from there in the future. Therefore, it is recommended to check the option that activates the import of new letters for the 30 days following the transfer (however, by default there is already a checkmark there). This step will help inform people you come into contact with in a timely manner about your upcoming move. Very forward thinking.
By clicking the “Start Import” button you start the process. A sign will appear notifying you that this operation may take up to two days, so you will have to be patient. However, you should in no way sit at the computer and wait for it to finish. Even if you log out, the operation will continue in the background. You can find out about the import status at any time by going to the same “Settings” - “Accounts and Import” tab.
Collecting letters from other mailboxes and sending messages via GMail
Above, we discussed how you can import all previously accumulated correspondence along with contact information into your GMail account. But we will go further and look at how Google Mail can implement almost all possible options for working with correspondence.
Let's set up the account in such a way that it collects all letters received in other mailboxes. Moreover, these can be addresses of Google Mail, third-party mail services (Yandex, Yahoo, etc.. But not only collecting letters is possible. During setup, you can also organize sending messages from these email boxes via Gmail. You can implement a similar trick from the same settings tabs by adding new mail accounts by clicking on the link of the same name:

After that, in the pop-up window, enter the email from which you want to receive correspondence in your Gmail account. Click “Next” and in the next step you make a choice: either directly import incoming letters, or use a wonderful function Gmailify, with which you can link the added email and your mail.
Perhaps, Gmailify will be the best solution, since not only will all your letters be collected in one place, but all the power of the functionality will be used to the maximum both in relation to your Google Mail account and an additional email inbox.
True, there is one nuance here. The fact is that Gmailify is not available for all email services (if you use Yahoo, AOL, Outlook, Hotmail and some others, then there will be no problems). During testing, I was surprised to discover that mail from Yandex is included in the circle of favorites, but, alas, this option is not intended for Rambler Mail:

I’ll probably continue the example with Rambler mail, since we’ll probably return to Gmailify more than once, but it won’t hurt to look at the standard configuration option. So, since in this case there is no other option other than direct import, all that remains is to proceed to the next step by clicking the “Next” button, where you need to enter the password for third-party mail and connect the necessary settings by checking the boxes:

In the screenshot above everything is described in detail. In theory, in the standard version, all the offered options are important and useful (backup, use of a secure connection, a separate shortcut and archiving). However, everyone may have their own reasons.
In the next step you will be notified that the account has been added and you can start collecting correspondence from it right in your Google Mail inbox. At this point you can complete the operation and further configure sending letters from the same email via Jimail from the settings. But we will do this right away by checking the appropriate box:

At the next step, you can enter any name that will be associated with the added mailing address and appear with it in the “From” field of the letter received by the recipient, as well as activate some other interesting functional options:

For example, you can specify absolutely any email address ( it will be present in the "Reply" field message sent from your main Google Mail mailbox and received by the recipient), which will receive a response from the recipient, if one is sent.
Now it is important to understand this. If you carefully examined the above screenshot, you noticed the checkbox opposite the option "Use as nickname". The fact is that the final result of its application depends on whether it is filled in or not (whether the checkbox is ticked, or, in other words, a flag), and here’s how:

Some clarifications need to be made here. When using an additional address as an alias, a letter sent to this email from a third-party user will end up in the Inbox of the main mailbox (as well as in a folder specially created for this), but only if in the Google Mail settings Archiving is not activated. Otherwise, the message will only be placed in a special folder (see 4th screenshot up).
Above, I tried to explain everything clearly, but I feel that it will still not be easy for everyone to immediately comprehend this information to the maximum extent. Therefore, as a bonus, I offer you a link to Google help on using a nickname .
But let’s continue with the steps to set up sending letters from an additional email (the previous step is shown in the second screenshot from here up). In the next step, the system will ask you to confirm this email address. To do this, you need to enter the newly added mailbox and follow the confirmation link contained in the letter received from Google, or enter the code located there in a special column (screenshot below):

After confirmation in the same settings tab, you will have the opportunity to determine the fate of your own correspondence associated with the main mailbox (the one where you will carry out the actions described above). Moreover, it doesn’t matter what options you used and what email address you specified as an additional one during the initial actions, the whole thing can be edited up to the complete deletion of the settings made:

By specifying additional you mask your main email address, as a result of which the person who received the letter will not even suspect that the sending was actually initiated from another email. You can select the sender's address from the drop-down list "From" fields, which will appear every time you write a letter:

Remember, when describing the process of adding an additional email account, I paid attention to creating a special shortcut for viewing messages incoming to a third-party email? At the end of the operation, this shortcut (folder), which can be highlighted in a different color (read about setting up shortcuts in the text above), will appear among others:

So, the main thing is that it is now possible to both send messages from an additional email using your main Google Mail address, and view the correspondence coming to it. If you have several mailboxes on other third-party services, you can add them at any time to send and/or receive messages through your main Google Mail account. To do this, you just need to use the appropriate links (3rd screenshot up).
However, automatic checking of letters arriving at the added email address is carried out at certain intervals. This can be done manually at any time by clicking on the link "Check mail"(the same third screenshot from here above).
If this does not create any particular inconvenience for you, then you can leave it like that. However, if it is important to instantly download letters arriving to the added mailbox to the base email, then you can configure their redirection in the account that you added to collect mail.
Forwarding emails from other accounts, setting up POP/IMAP for email clients and account access rights
If you have configured your other Google mailbox as an additional one, then you need to go to this account and in the same settings in the tab "Forwarding and POP/IMAP" add a forwarding address using the button of the same name:

As a result, a message will be sent to the email inbox where all mail will be sent, containing a link to confirm the email that you need to follow.
If you need to speed up the receipt of letters from emails from third-party services (Yandex Mail, Rambler Mail, Mail.ru, Yahoo Mail and others), then it is in the accounts of these mail services that you should set up forwarding to Gmail. The process of confirming email addresses will be mostly similar (following the link in the letter sent to the specified Google email).
By the way, in that tab you can turn on and off the POP and/or IMAP protocols if you want to organize access to correspondence through email clients (there are also links to instructions for setting them up):

Now let’s return to the previous “Account and Import” tab, where the possibility of providing access to the account to third parties with limited rights remains unconsidered:

The added user will be able to read correspondence and send replies to letters, but will not be able to edit settings, change the password, and perform other similar actions. In general, we give Jimail credit here too.
Filtering emails in Google Mail
We continue to consider tools that will help you conveniently structure your correspondence. One such tool is Google Mail. are filters, accessible again from the settings hidden behind the magic gear icon, where they are located on the corresponding tab. Here you can find already existing filters (if you created them earlier), as well as tools for exporting and importing them. But we are primarily interested in the possibility of creating a new filter:

When creating it, you need to think through the algorithm by which the system will properly filter your correspondence. After clicking on the “Create a new filter” activation link, a window like this will open, where you will need to fill in the required fields, in which you need to note the characteristic details that determine the filtering of this kind of letters:

You can check the effectiveness of the configured filter on the go by performing a test search for letters using the specified parameters. If testing does not satisfy you, you can immediately make the necessary changes. Once you are satisfied with the intermediate result, proceed to the next step by clicking on the “Create filter” button.
At this stage, you need to determine where incoming messages that match the specified Gmail filter will be placed, as well as the associated accompanying actions:

In the screenshot as an example, I have activated several options with check marks. I’ll show you clearly how they work below, but first you need to explain the purpose of all the available points:
1. "Skip inbox (archive)"— by activating this option, you can successfully avoid an overabundance of letters in the corresponding Inbox folder.
2. "Mark as read"— if you enable this option, messages will not be highlighted in bold, as happens by default with all unread messages.
3. "Mark"— if you look at the list of letters, then on the left of each of them there is an image of an asterisk. If you click on it, it will turn orange. This way you can manually tag any message. So, if you configure this option, then all mail that matches the specified filter will be automatically marked like this:

If the standard symbol is not enough for you, in the same settings in the “Stars” subsection of the “General” tab you can find a whole series of icons, and from them you can assemble an arbitrarily rich set for use:

Just don’t forget to save the changes after completing the settings by clicking the button of the same name at the bottom of the page. As a result, you can select the desired symbol from the current set to mark letters by clicking the left mouse button on the icon present there:

4. Apply shortcut— in other words, set up filtered emails to go to the desired folder. You just have to choose exclusively from simple shortcuts (not system ones) created by you or provided by Google.
5. Forward— the Gmail mail service is capable of redirecting incoming letters to another email that you specify, as well as receiving messages sent to any other email address (however, details about the nuances of mail forwarding will follow).
6. Delete. It’s logical to enable this option if you want to once and for all put an end to those annoying mailings that sometimes you can’t unsubscribe from. You set up a filter with deletion, and bam - the hateful messages go straight to the trash. Of course, the Jimail spam cutter works almost flawlessly, but, as they say, even an old woman can get screwed.
7. Never send to spam— if you fill in the checkbox next to this option, then letters filtered in this way will never end up in the “SPAM” folder. Since filtering is compiled by the account owner based on several criteria at once, in many cases checking this box will not be superfluous.
8. Always mark as important— as noted in the chapter on setting up the Inbox folder, the system, based on multiple factors that it analyzes, is able to automatically sort incoming correspondence, including highlighting important ones. By checking this box, you are indicating in advance the importance of emails that fall under this particular filter.
9. Never mark as important— setting reverse to the previous one.

11. Apply filter to matching email threads: 0— filtering will apply to letters that have already been received and fall within these settings (the number after the colon indicates their number).
At this point, setting up the filtering process can be considered complete. Next, test the filter for its effectiveness, adjust if necessary and use it to its fullest.
What other useful options can be implemented in Google Mail?
Let's take a look at those settings tabs, hiding behind the gear icon, which I have not yet touched upon during the publication. Most of them do not require a detailed description and are not used by everyone (), so I will list them only briefly:
- "Extras"— makes it possible to check the box to allow the installation of modules that will expand the already huge functionality of Gmail;
- "Chat"— here are the radio buttons to turn on/off the chat (if suddenly someone doesn’t know this tricky term, then this is a form of communication between users in the form of messaging), which, when active, is located by default in the lower left corner;
- "Offline"— activation of a very useful function that allows you to use GMail even when there is no Internet connection ();
- "Themes"— here you can choose a suitable design for the interface of your mailbox and change it at any time.
For more details, you should probably look at the tab "Advanced", where you can learn a lot of useful tricks, some of which your humble servant enjoys using:

I will note those that are suitable for most users (again, in my humble opinion):
Unread messages icon. When you enable this option, in the tab where Google Mail is open, a number will appear showing the number of letters that you have not yet read. It seems like a small thing, but the benefits are obvious:

View area. Another feature, although it has lost its uniqueness (a similar function works, for example, in Yandex mail), but this does not make it any less significant.
The bottom line is that after activating it, a new button will appear in the upper right corner, with which the entire window can be divided horizontally or vertically. If you select the vertical viewing mode, a list of all messages will open in front of you on the left, and on the right you can see the contents of any selected message. Extremely convenient:

Custom keyboard shortcuts. If you enable this function, a separate tab will appear in the list of settings, where it will be possible to set hotkeys to speed up frequently performed actions (current combinations that can be changed are indicated):

Response templates. Just a great opportunity to save time for those who often respond to the same type of messages. From my own experience, I can say that this is very annoying, even if correspondence on the desired topic is saved in the mailbox, from which you can copy the text. Copying is also not the best option, especially if you have to do it often.
So, activate this function from the settings, and then open the window for writing a letter by clicking on the plus button in the upper left corner, located directly above the list of folders. Specify the topic that will serve as the name of the future template, and of course, do not forget to enter the content. After that, in the lower drop-down menu hiding behind the cryptogram with three dots, select “Answer templates” - “Save as new template”:

And in the next step, enter a name so that in the future it will be easy to identify the saved templates, especially if there are several of them. If you need to respond to a letter in which a topic that already exists is raised, call up the same menu by clicking on the familiar symbol, which will also be present in the form of reply to the message, and simply select the desired one from the list of saved templates:

After clicking on the name of the template, its contents will be automatically inserted into the body of the letter. Naturally, before sending a message, you can always adjust its content if the situation requires it.

Probably, I’ll focus only on the features that require additional clarification or on those that I have so far ignored in today’s publication. So:
"Cancel sending"- sometimes a situation arises when, after sending a letter, you suddenly remember that you forgot to indicate something important or attach a necessary file. Using this setting, you can specify the time limit when it is possible to cancel sending a message (maximum value is 30 seconds):

"Dynamic Content"— this option is enabled by default and provides the ability to perform certain actions after receiving a letter containing dynamic components, such as filling out questionnaires, responding to comments, etc.

"Smart input". This feature is one of the most extravagant. Probably, at the moment this is a complete exclusive. Judge for yourself:

When active, this function initiates the automatic insertion of phrases and expressions as you enter text, which allows you to significantly speed up writing a message. Unfortunately, this option is currently only available to speakers of English and a few Romance languages (Spanish, Portuguese, Italian and French). Russian is not yet one of the privileged languages, but I am sure that everything is ahead.
"Experimental access"— Gmail developers work tirelessly and are constantly introducing some innovative things (this is also why Google Mail is so popular). This settings item will allow you to get involved with the latest developments and personally participate in testing certain features with which you plan to expand the functionality.

If you decide to enable access, the test features will be added to the settings (this may not happen right away) and marked with a flask icon (look at the screenshot above). At any time, they can be turned off individually or all together.
"Signature"- we cannot fail to mention such an important component that can save you from routine work. Compose the end of the letter, which will be automatically inserted into every message you send:

If you remember, Gmail allows you to create an unlimited number of email accounts. Therefore, if for each case you allocate a separate mailbox (for business correspondence, for communication with family, etc.), then in each you can create a separate signature suitable for this particular social circle.
"Answering machine"— if you are unavailable for a certain time and will not be able to respond to incoming messages in a timely manner, you can configure this function by entering the start date of the autoresponder, as well as the title of the subject and the text of the content of the response letter:

As a result, a message with an automatic reply subject will be displayed at the top of the interface. If you specify an end date for your answering machine, it will turn itself off when it expires. Otherwise, you will need to click Finish to deactivate it.
In addition to the functions that I mentioned just above, here you can configure the interface language, including input methods, enable notifications from Google Mail on the desktop, and also activate shortcut keys, personal letter icons (as a result, inboxes addressed to you personally and mailing letters sent to several addresses at once are marked in a special way).
There is a lot of functionality, but I still recommend choosing a moment and customizing all the Google Mail functionality to suit your wishes. By doing this, you will systematize your work with correspondence, as a result of which you will not only gain much-needed comfort, but also save valuable time.
Some secrets when working with correspondence
All we have to do is figure out what interesting options are present directly when working with mail and how convenient everything is arranged here. Well, some of the gadgets have already been evaluated by us during the story, since they are closely related to settings and other options.
Let's look again at what the interface of Jimail's personal account looks like on the main page, where the list of incoming letters is located. At the very top there is a search bar with which you can search messages according to a wide variety of parameters (topic name, postal addresses, content, volume of letters, etc.):

In order to use the search functionality, you need to click on the triangle on the right side of the line, as a result of which a table with filters will appear, in which you should set up filtering out the necessary correspondence (search and filters have already been discussed above).
Let me remind you that above the list of letters the names of the three main categories are located by default, by which incoming correspondence is sorted (“Unsorted”, “Social networks”, and “Promotions”), which is logical, since messages in precisely these directions are composed these days the bulk of the average user's inbox.
Let me remind you that you can change this disposition at any time from the already familiar settings in the “Inbox” tab by deleting what you think is an unnecessary category or, conversely, adding the one you need from the list (“Alerts”, “Forums”).
For any action on letters, you need to put a tick (fill in the corresponding checkbox) opposite one or more messages, and here everything is implemented so that the user makes a minimum of body movements: it is possible to select one message, all at once or a group (read, unread, flagged, without notes):

After selecting at least one letter from the list, a set of tools will appear at the top with which you can perform, it seems, all possible operations:

In the screenshot above, all the tools (by the way, the default icons symbolizing them can be replaced with text from the settings in the “General” tab) are numbered, and those that do not fit in the top panel are also present in the drop-down list, which is called up by clicking on the cryptogram with three dots . Let's take a quick look at the ones that require some explanation:
1. "Archive"- I have already touched on this option, which is that the letter is placed in the archive. At the same time, it will not be difficult to find it in the folder "All mail" or using search, which, as we found out, is quite functional. At the same time, if a reply is received to a message located in the archive, it will automatically reappear in the “Inbox” folder.
2. "To spam"— as we already know, Gmail confidently recognizes letters from spammers and places them automatically in the appropriate folder. But there are no perfect algorithms, so from time to time such messages may appear in the Inbox. However, users themselves can send to the folder "Spam" unwanted correspondence. By the way, such actions help the system make the necessary adjustments when automatically filtering messages.
3. "Delete"— moving the selected letter(s) to a folder "Basket", located in the list of other shortcuts in the left menu (to see it, click on the “More” link). Throwing messages into the trash does not lead to their physical deletion from the server, and therefore the correspondence that ended up there can be restored or completely and completely eliminated.
4. "Mark as read"— I think comments are unnecessary here. Let me remind you that all unread messages are highlighted in bold in the list by default.
5. "Postpone"- if the message you receive is not super-duper important, and you don’t have the time or opportunity to respond to it immediately, you can set a time when it will appear in your inbox again, reminding you of yourself. Another cool feature (there’s already a lot, don’t you think?).
6. "Move"— send the selected message to the desired folder, a list of which will appear when you click on the corresponding symbol.
7. "Shortcuts"— you can immediately define an existing shortcut for a selected letter or group of messages from the list that appears when you click on the icon, or create a new one and immediately place the messages there.
Well, a couple of options from the already mentioned menu under the button with three dots:
"Add to tasks"— this function allows you to associate the selected letter with the completion of a particular task. After selecting this item, a special section will open on the right side of the interface, where you can only add the necessary information regarding this specific message, but also set a new task:

When is it needed? Well, let’s say, if you are a manager or owner of a large or even not very large company, then such an option will help in receiving applications from clients and their subsequent distribution among employees and specialized departments.
"Ignore"- perhaps you have experienced situations when you are tired of frequently arriving letters of approximately the same subject, which, however, you do not dare send directly to spam or delete, feeling that they will be useful in the future.
That's when this option comes to the rescue. Once you ignore one such message, the next ones will no longer be present in your inbox. But you can always return the chains of these messages from the depths of the “All Mail” folder.
To read a received letter, you need to select it from the list by clicking the left mouse button (although everyone seems to know this, but ignorant beginners may not be aware). Moreover, when you move the cursor to a message, some icons of the functions we discussed just above appear in the list (I assume you already know them):

Go ahead. To write a letter, you need to use the “plus” button located immediately above the list of shortcuts (folders) on the left (see fourth screenshot up). After clicking on it, a window for writing and sending a letter will appear, which is also full of a variety of options:

I think everything here is absolutely clear and laid out on the shelves. The only thing I’ll explain is what it means confidential mode. This option makes it possible, for example, to define a period after which it will be impossible to read the letter, activate access to the received message using a special code, and also block forwarding. Such measures will improve the security of the transmission of important information.
Now let's see what operations can be performed with received messages. Let me remind you that to go to the contents of the letter you need to click on it in the inbox list. If the message arrived in a language different from the one installed in the interface of your account, then it is possible to translate it (say, from English to Russian) using built-in Google translator:

Well, on the right side of the open message page there will be a list of all kinds of operations that can be applied to it. This list of functions is called up from the drop-down menu by clicking on the dotted icon:

You can immediately write a response, forward, create a filter (filtering was discussed above), print, add the sender to your contacts or block, delete the letter, etc.
Hangouts Chat and 15 GB with Google Disc and Google Photos
It seems like everything has been sorted out, but there are still a couple of points left that are worth mentioning. Let's say the bottom left of your account window is enabled by default chat window related to instant messaging service Hangouts along with the necessary settings and the ability to search for contacts, in which you can communicate with the right people using this messenger:

When describing the functionality of GMail, it is necessary to mention that after registration you receive free use of 15 Gigabytes free space (but keep in mind that it is intended not only for mail, but also for your images and files stored on services and Google Photos). Information about the currently used volume is displayed at the very bottom, just to the right of the chat. You can increase the size of your existing storage by going to the Manage link and
Gmail.com email is the most popular email nowadays. This mail is provided by Google absolutely free of charge.
Of course, a popular corporation could not create something simple. That is why mailboxes of this service are increasingly chosen by users.
Due to the widespread popularity of Google's service, it is very difficult to get a login you like. A large number of previously created accounts suggests that a large number of names are already taken.
Therefore, you will have to think carefully to write down not only a convenient and unique, but also a memorable login.
What is very convenient is that creating a login involves the ability to insert dots, dashes, underslashes, etc. into it. This will greatly simplify the task.
Check that mail creation occurs on the Gmail.com platform, and not on Gmail.ru. Since the second service is paid and there is a real possibility of losing your account.
So, how to create a gmail email and register on your computer.
1 To do this, on the main page of the Google search engine you need to find the “Mail” button.
Google Mail button
3 After this, a new window will appear in which you need to fill in all the fields. At this stage you will have to come up with a name for the mailbox.
If such a login already exists, the system will indicate this and the user will have to change something.
Choosing a password
Read also: Our TOP 10: The best programs for comfortable work with your email
4 Password is also a very important aspect of security. It should not only be memorable, but also heavy enough to prevent a hacking attempt.
The system will indicate the complexity of the password - an indicator will light up next to it, and as soon as the bar turns green, you can understand that the password is secure.
You need to specify a phone number and an additional mailbox in order to secure your mail.
Notifications will be sent to your additional email that your email has been logged in, which will help you react quickly and change your password if something happens.
And a mobile phone, in addition to protection, gives access to additional features.
After correctly filling out all the relevant fields, click “Next”.
5 After correctly completing the previous steps, it will appear in which the rules of use and privacy policy will be written. Scroll down and see the “Accept” button. Click on it.
You will need to verify your account using your mobile phone. To do this, you can select one of two options and the system will either send a message or make a call using a robot.
After completing these steps, the system will congratulate you on purchasing a new mailbox and offer to go to your account settings.
Don't neglect these settings. They include 3 points:
- Security and entry.
- Personal and confidentiality.
- Account settings.
Each item has a number of subitems. Here you can customize the service “for yourself”, making it as comfortable as possible for use and subsequent work.
Create gmail using phone
Read also: How to make Google your start page: instructions for all browsers
1 Every modern smartphone is immediately installed with a program called Gmail.
Typically, a mailbox is created at the moment when the smartphone is configured after purchase.
However, sometimes it happens that they are produced in a store, for this they use basic mail with a simple password, or they create simple mail with a basic password.
It often happens that the user is not satisfied with this option. In this case, you can create a personal mailbox that will be configured as convenient.
First, we find the corresponding application, which is described above.
2 Find the side menu (click on the three bars in the upper left corner. Select the “Settings” item and click "Add account".
After which the email settings page will open. You need to click on Google (first item).
After which the system will prompt you to either enter an already registered address/phone number or create a new account. Select the second item.
After this, you will have to wait some time until the robot sends you an SMS with a code, but you will not have to enter it, since the program will recognize it and enter it automatically.
After this, you can fill out the proposed fields, such as date of birth and gender.
4 The next step is to create a login (mailbox name). I'll have to think about it. If such a name is already taken, then after clicking the “Next” button, the system will display an error and offer free options for selection.
5 You can choose from those available, or you can try to enter what you like, but there is no guarantee that the system will not reject the following. If there is no such name, then the transition to the next item will take place.


Good day, dear readers of my blog. In today’s article I would like to tell and show how to quickly and easily create a gmail email. Gmail is the well-known powerful Google email service. As Google writes, one free account is the whole Google world. Many people register in Google mail only for Google Play (Google Play) in order to download toys and applications and play, well, actually update)
The world of Google includes a lot of interesting things, it can be used in different ways, for some it is just a mailbox, for others it is a convenient and powerful tool for business. For others, it's just an account for games and apps. Many users do not use even half of the services from Google.
I will not describe all the delights of setting up a Google mailbox in this article, because it is long, you can read about the pros and cons on your own on the Internet. We will consider the practical part and analyze how to register Google mail.
In order to create an email, you need to go to the registration page:
You will be taken to the registration page, where the entire process of creating mail will take place. The point of registration is to enter your correct data, go through confirmation and “it’s in the bag.” If you have ever registered with email services before, the principle here is exactly the same.
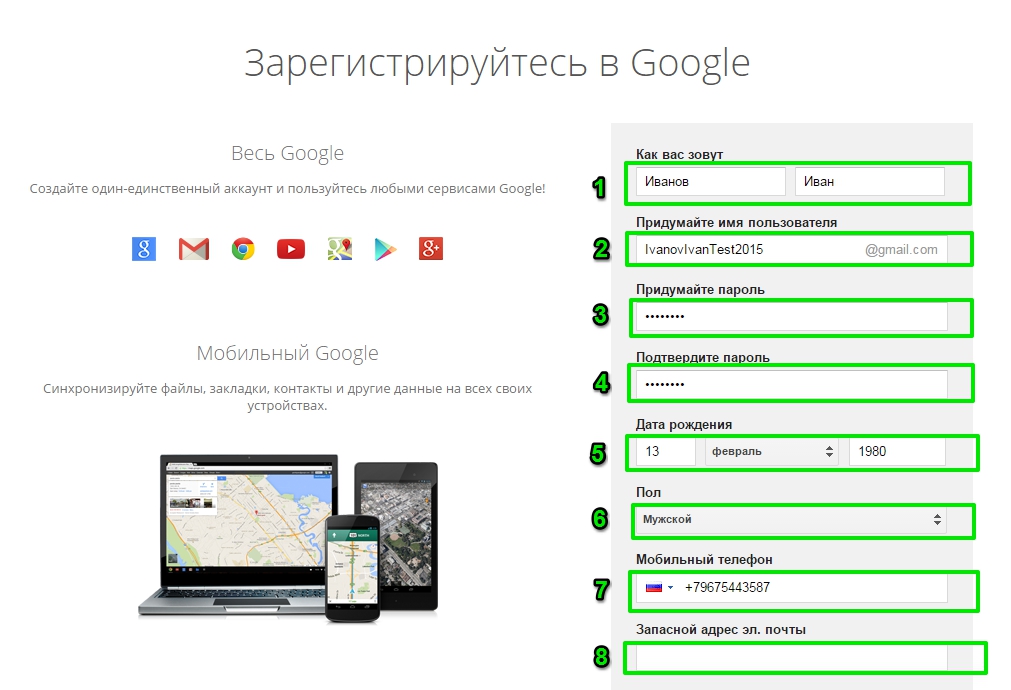
In the picture below I have described filling out the fields. Look, if this is enough for you, then that's great. But if you want a detailed description of filling out each field, below I tried not to miss the subtleties of filling out.

Detailed description of filling out fields during registration
Step 1. On the page that opens, we begin to fill out the form. Enter First and Last Name, then you need to come up with the desired name for the mailbox.

If you see a red inscription - The name is already taken. Use this simple advice, which will almost 100% make it possible to register a unique mailbox.
Advice: When registering any mailbox, come up with a name that is memorable, easy to pronounce or simple to write. When registering, you can use: dot, numbers (for example: region code, memorable date, etc.). You can swap them, but without fanaticism
After playing with the name of the future mailbox name, it should turn out that the system will not issue a warning about a busy name, which means that it can be used during registration.

Step 2. Okay, you’ve come up with a name, now you need to come up with a high-quality, reliable password. When you enter your password, you will see a password strength analyzer. We confirm the password, enter exactly the same password as entered above, and move on to the next column.

Step 3. Enter the date, select the month and year of your birth. Select gender from the drop-down menu. Next, enter your mobile phone number. (Knowing your phone number, you can always easily recover your password usingSMS if you forgot. The thing is useful and necessary. Do not neglect your safety.)
Spare email address, you don't have to enter it. If you have other mailboxes, then, in principle, you can enter it in this field, but not necessarily. ( This is necessary for control and security of your Google mailbox.)

Step 4. Let's move on to the most interesting part, where you need to prove that you are not a robot. Let me get ahead a little - this can be done in two ways, which we will now discuss.
First way: Enter the words or numbers shown in the picture. You can click on the round arrow several times and select a simple word or numbers to type.

Check the boxes, thereby accepting Google's terms of use and privacy policy, and click - Further.

Second way: Check the box next to – Skip this check. In this case, a telephone verification will be required.
When you select this method, fill out all the fields and click on the button - Further.

You will be taken to a confirmation page, verify your phone number, select – Text Message (SMS) and click continue. The SMS arrives instantly.

Check your mobile phone, enter the confirmation code and press the button - Continue.

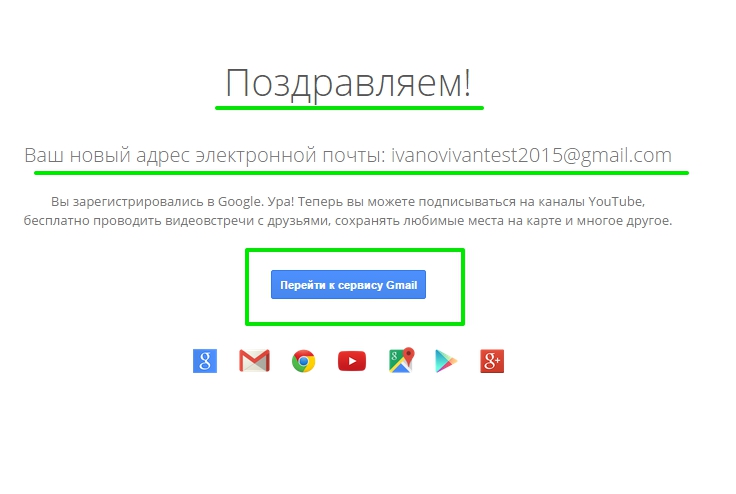
After confirming your mailbox, you will be taken to a page with congratulations and the name of your new mailbox.
Click on the button - Go to serviceGmail, the system will automatically redirect you to the web interface of your email account.


We have just walked you through it step by step and figured out how to create an email in Google, you can use it on your phone or tablet in Google Play. Registration on a computer, laptop or tablet is absolutely no different, all the same fields to fill out, all the same questions :)
I hope I helped you at least a little in this matter. You can ask your questions in the comments or express your opinion about the article, I will be glad to hear your opinion.
Gmail.com is an example of an email service. Therefore, I created my personal, main mailbox on Gmail.com, although by that time I had about five e-mail addresses from other mail services.
I love the ease of use, reliability, and capacity of my Gmail.com inbox. By registering a mailbox on Gmail, you get the opportunity, with the same login and password, to access other Google services: the most popular video hosting YouTube, calendar, Google documents and many other useful services.
Registering with Gmail.com
To register for Gmail in Russian, go to the official website https://mail.google.com.
The Google Account login window will appear.
In order to log in, you need to enter the mobile phone number or email address specified during registration. But since you are not registered yet, click the More options link 
From the options provided, select Create an account.
A page will open with a form that you must fill out. 
We fill out the form.
- What is your name. Here I advise you to indicate your real First and Last Name. Because other Google services, including those on your smartphone, will be associated with this account. I think this will be your main inbox for a long time! If you need a temporary mailbox, then you can follow my tutorial in a few minutes.
- Create a username. This will be the name of your mailbox and login to your account. You will have to work hard to find a clear and memorable name. After all, names like olga, nina, ivan have been taken for a long time. Substitute names, and the system will tell you whether this name is occupied or free. To create a name, you can use letters of the Latin alphabet, numbers and dots.
- Create a password. The password must have at least eight characters. For security reasons, it is not recommended to use passwords from other sites.
- Confirm the password. To make sure you entered the password correctly, enter the password again. If the system displays that the passwords do not match, check whether the keyboard layout is set correctly. There must be Latin letters, not Russian.
- Date of Birth. Select from the drop-down list.
- Floor. Selected from the list.
- Mobile phone number - necessary for more reliable account protection. If important documents are stored in your mailbox, you can allow login to your account only after receiving an SMS with a password on your mobile phone. Also, if you forget your password, you can request an SMS with a code to change your password.
- A spare email address is necessary for more reliable account protection. For example, if suspicious activities are noticed in your account, the gmail administration will be able to send an alert to this address.
- Make Google my home page. If you check this box, the Google search engine will always appear when you open the browser. But many users make their favorite site their home page. Then, you don’t need to check the box here, otherwise your page will be replaced with a Google page.
- A country. Select the country in which you currently live from the list.
After filling out the form, click Next. 
The Privacy Policy and Terms of Use page opens. Read (scroll down the page) and click the “I Accept” button. 
The "Verify your account" window will open. Enter your mobile phone number and click the "Continue" button. 
A window will appear to enter the Confirmation Code, which will be sent to you via SMS. If the code does not arrive within 15 minutes, try again. I managed to complete the registration the third time. After entering the code, click the Continue button. 
You will be congratulated on your successful registration and asked to log into your Gmail account. Click the "Go to Gmail service" button and start getting acquainted with your new mailbox. 
You will see buttons by clicking on which you can select the theme (appearance) of your mail account, change (add) the main photo of your profile, import addresses and mail from another mail account. By the way, your new mailbox will already contain a letter from Google describing the capabilities of your Google account. And by clicking the “How to use Gmail” button, you will learn all the features of working with this mail service.
Video: how to register with Gmail - create a profile on Google
The video clearly shows:
- How to register with Gmail and gain access to all Google services;
- how to create folders,
- how to sort emails into folders,
- how to prepare a signature for letters,
- how to add files to letters,
- how to switch to other Google services?
Login to gmail.com
If you have already registered, then to log into Gmail, click the link mail.google.com
In the window that opens (Fig. 1), enter the Email or mobile phone number associated with your account and click Next. By the way, you can enter not the entire email address, but only the login - without @gmail.com
A password entry field will appear. Enter your password, click "Next" and your mailbox will open in front of you.
Sign in to other Google services
By registering with your email, you can use this username and password to log into any Google service. 
While in your Gmail account, in the upper right corner, click the square (shown by the red arrow). A window with many buttons will open (see Figure 5). By clicking the desired button, you will be taken to the most popular Google services: Calendar, YouTube, Search, Maps.
And by clicking the link More, you will see buttons to other Google services, for example, Docs.
Hello dear readers. In the age of technology, most people, if you don’t take grandparents, although they have probably also become more advanced in terms of the Internet, have forgotten what it’s like to write letters by hand and stand in huge lines at post offices. We have switched to such a convenient method of communication as email.
Indeed, this method of communication is much more convenient than regular writing. There is no need to wait for weeks; you send it and the recipient receives it right away - just an incredible time saver. This is the type of quick correspondence we will talk about in this article, and in particular about how to create an email in Google.
This is a service that allows you to send messages to different parts of the world in a matter of seconds. Moreover, you can attach documents, scans, photographs or audio and video recordings to them. It should be noted here that this is email. This means that for it to function you need to have a computer and the Internet.
Types of postal services
The most common services nowadays are: Yandex, Google and Mail. Each of them has its own advantages and differences. Let's talk a little about each one separately.
Mail.ru
This is a portal created for communication, founded in 1998. Initially, mail was created as a service for sending messages; later, various sections began to appear on the site that allow its users to receive information about the weather and various news.
Now the email ranks 5th in terms of growth in the number of users. This is a fairly good email client that provides ample opportunities for its consumers.
Yandex Mail
The search system was announced in 1997 and was presented as a search engine, but over the years it has also become a multi-portal with its own store, the ability to listen to music, places to store information on the Internet, etc. And, of course, another main direction of this company is the postal service.
Google

The Google search engine was founded in 1998, and the mail only came into existence in 2007. However, even at that time it had a number of significant advantages over its competitors. We'll talk about this later. This is not only a search engine and an e-mail client, but also a huge number of useful services, ranging from gaming to quite serious business projects.
You can create a mailbox on any of these services absolutely free, it all depends on your preferences. Today we will talk about how to create a new Google account. Here are step-by-step instructions for registration, which will be supported by photos for a more complete understanding.
Google registration instructions
1. The first thing you need to do is go to the site itself https://www.google.ru/
2. Next, in the upper right corner, click the “Login” button  3. After this, a page with data entry will open, but since you are initially registering, you do not have it, so on this page you must check “Add an account”
4. After this, you will see a field for entering your e-mail, however, you have nothing to enter yet, so you click on “Create an account”  5. Google prompts you to register, let's do it and move on to the data column:
The first thing you need to enter is your first and last name. Next, you come up with a username, that is, a login and enter it in the next field.
Note: If you entered a username that already exists in the system, you will be notified.
After that, you need to come up with and enter a password and repeat it.
Note: If the password is entered incorrectly, the system will also notify you about this.
6. After this, you need to prove that you are not a robot and enter the numbers from the picture.

The country is determined automatically, but if you want to change it, you need to select the arrow, after which a window will pop up and you can specify what you need. We settled on Russia.
Now all you have to do is tick the box that you agree with everything that is offered to you and check “Next”.
7. That's it, your account is ready! Click the “Go to Gmail service” button and you can get started!
How to use Google mailbox
Let's see how you will use your account.
You can log into your account from absolutely any Google search page. Your login will be indicated in the upper right corner; clicking on it will open a field where it will be written: “My account.”
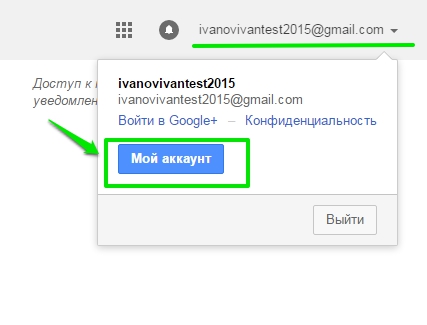 By clicking on this button you will be taken to a menu where you can configure the account itself, its security and confidentiality.

Now let's move on to the box itself. In order to enter it, you need to mark either the “Mail” icon or the icon with squares in the same upper right corner. After which the functions menu will open, where you need to click on the “Mail” button.
After this, your email account window will open.
Let's look at some of the functions of the Google mailbox
This is what the window of the mailbox itself looks like, in which there are already 3 incoming letters from Google.

Here you can not only write to someone, but also see how many messages you have in total, how many you sent, received, at what time, etc.
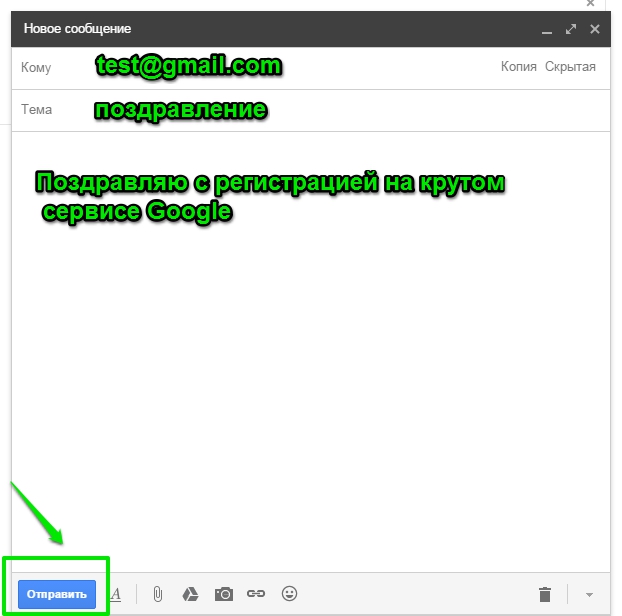
In order for you to write a letter, you need to select the red “Write” button and you will see a data entry window appear in the lower right corner.
Here you can enter the recipient's address, subject and text itself, as well as add a document or image, or use emoticons.
Everything is quite simple.
In order to send a letter, you just need to click on the “Send” button.
Benefits of working at Google
- The ability to store up to 15 GB of information on a virtual disk, while this is the only company that provides this amount of memory.
- You can also upload your documents to Drive, with which you can quickly and easily send them to your friends and colleagues.
- Photos and videos are downloaded without the help of various programs. All you need to do is drag the document into the message window.
- You can link your account to any site that supports this system, such as youtube, and receive notifications from there.
- Also, information about a new message is available on any search page, and if you use Google Chrome, then a special application will show you a new message that has just arrived.
There is a lot to be said about the benefits of working with Google. The most important thing is that it is adapted not only to work on a computer, but also on smartphones and tablets. Well, now you have found out about the existence of such a convenient service and all you have to do is create an account and enjoy its capabilities!
Sincerely, Ekaterina Kalmykova