Before installing third-party themes in Windows 7, you should patch the system using certain utilities. These same programs will change system files, after which you will have the opportunity to install various themes (there are a lot of them on the Internet).
Where to find the necessary software
Finding the necessary software is not so difficult; to install themes in the seven you will need to update the system files using the following programs:
- Theme-Resource-Changer
- Universal Theme Patcher
In the first utility you just need to follow the instructions (ala next-next-continue), but in the second it’s even simpler - click on three buttons, thereby patching each file. After these manipulations you need to reboot your PC.
Installing a Third Party Theme on Windows 7
Installing third-party themes on Windows 7 should be done with extreme caution. You need to make sure that the theme will be supported by your system. For example, design themes are not supported in all editions. You can install the theme in Maximum, Professional, Corporate and Home extended versions. In other editions (Home Basic and Starter) themes are not provided, and it is better to refrain from installing them (it may not work, unfortunately).
First of all, we need to download the theme itself. Countless numbers of them can be found on the Internet, so I think there will be no problem with this. After downloading the archive (this is how themes are most often distributed), we must unpack it into a folder located at the path: C:\Windows\Resources\Themes

Now you should activate the newly installed theme. To do this, go to Control Panel > Design and Personalization > Personalization, where we perform the actions we need. By the way, it would be easier to just right-click on the desktop and go to personalization from the context menu.
If everything was done correctly, you will see the result immediately. However, it should be recalled that in preview screenshots, most often, the design is demonstrated along with third-party labels. The theme itself does not have them, and you will have to install such shortcuts separately.
Also, most likely, the theme will have separate navigation buttons, and these will also be shown in the preview. To install them, you need to replace the system file (the replacement for which should be included in the archive along with the theme) ExplorerFrame.dll, which is located in C:\Windows\System32. There is no need to delete the old file; it is best to simply rename it, adding some simple prefix at the end. Something like ExplorerFrame.dllagant. In this case, the file will not be read by the system, and at the same time, you can easily return everything as it was by simply erasing this same prefix (and deleting the replacement file accordingly).
This month, Windows 10 users received the first major update for the system. Unfortunately, with the new version of the system Neither patches for installing third-party themes are compatible(the patch has already been released, see Method 3), nor the actual themes created for the first stable version (10240). The following describes a temporary solution to this problem, and in two ways at once.
To begin with, we’ll immediately warn you that by using these instructions you will be able to use third-party themes, but only those specially created or modified for Windows 10 1511 (aka “with the November update”, aka build 10586). Some authors have already started modifying their most popular themes, but this is unlikely to be done for all previously released themes.
Method 1
Attention! In Windows 10 1511 with build number 10586.494 (update was released on July 12, 2016), this method no longer works. It is proposed to use instead Method 2.
Now let’s talk about how to patch Windows 10 1511 to install third-party themes. Until the authors of the patches have prepared a more elegant solution, you will have to perform several steps and use the necessary system files prepared by the customizer under the nickname .
- Download and unzip a set of necessary tools on disk Theme Patcher (link at the end of the article).
- Run and install patches as administrator UxStyle_0242_x86_x64_preview And UltraUXThemePatcher_3.0.4.
- To restart a computer.
- Run file Add_Take_Ownership_to_context_menu.reg and agree to make changes to the system.
- Go to folder C:\Windows\System32.
- Become the owner of the files by right-clicking on each one and selecting the item in the context menu Take Ownership.
- Create backup copies of files themeui.dll, uxinit.dll, uxtheme.dll or just give them new names, like old_themeui.dll.
- Copy modified files themeui.dll, uxinit.dll, uxtheme.dll from folder File Patch x86 or File Patch x64(depending on the bit depth of your operating system) to the folder C:\Windows\System32.
- Reboot (although our test system did not require a second reboot).
Now your system is ready to install third-party themes.
Attention! We do not recommend using modified system files; this may lead to complete inoperability of the operating system. Before using these instructions, we strongly recommend that you create a system restore point. You do everything at your own peril and risk.
If you have problems using the first method, try the second. It is safer and simpler, but less convenient due to the need to edit the theme file of each newly installed theme.
Method 2
- Create a system restore point.
- Download and install the patch (the project seems to be closed) or its .
- Rename file C:\Windows\Resources\Themes\aero\aerolite.msstyles V aerolite.msstyles.bak
- Create in folder C:\Windows\Resources\Themes\aero\ a new folder named aerolite.msstyles
- Copy the desired theme to the created folder.
- Open the theme.theme file in any text editor (Notepad will do) and replace all instructions with the standard path to the theme files:
C:\Windows\Resources\Themes or %SystemRoot%\Resources\Themes
on new:
C:\Windows\Resources\Themes\aero\aerolite.msstyles or %SystemRoot%\Resources\Themes\aero\aerolite.msstyles - Apply theme in panel Settings → Personalization → Themes → Theme Options.
Method 3
In early February 2016, one of the enthusiasts put together UXThemePatcher for Windows 10 1511. Manual file replacement is no longer required, the program does all the work independently. However, the above instructions may become relevant again after the release of one of the future updates for the system. Updated 04/19/2016 — and so it happened: the patch does not work in the newest versions of the system.
Windows 7 is an operating system whose visual style can be changed beyond recognition. There are a huge number of third-party themes available for free download. Gamers can design the system in the style of their favorite game: Stalker, World of Tanks, Dota, Diablo, Skyrim, Call of Duty, etc. Fans of simple compact themes pay attention to minimalism. There are themes to suit every taste:
- mentioned games;
- movies;
- anime;
- music;
- minimalism.
Skins in the style of the Mac OS operating system are especially popular. No Apple computer - no problem now.
There are many sites on the Internet with themes to suit every taste. Below is a list of trusted resources. You are guaranteed to download the theme you like without registration and will not drag viruses or adware onto your computer.
Comparison of sites
| Website | Description | Number of topics | Sorting by category (games, movies, etc.) |
|---|---|---|---|
| 7Themes.su | 7Themes. A site that hosts more than 650 themes only for Windows 7. A big plus of 7Themes: division into categories | More than 650 | Yes |
| Oformi.net | The site is similar to the previous one. But the number of topics is half that – 300 pieces. The download is free, there are clear instructions for installing themes. A nice feature of the site is the ability to sort topics by date added, popularity, number of comments and alphabet | More than 300 | No |
| All4os.ru | All4os.ru completes the top 3 sites with free themes. There are over 230 of them here. As on previous resources, there is a sorting option, a detailed description of each topic and screenshots | More than 230 | No |
How to install a Windows 7 theme
After selecting the appropriate skin, prepare Windows to support third-party themes. The task is simple and will take no more than 10 minutes. Even though Windows 7 supports full style conversion, it may experience some glitches. Therefore, we recommend creating a restore point before the installation procedure. In case of OS problems, you can “roll back” it to the previous level. The instructions consist of two parts: installing patches and directly adding the theme itself.
How to patch system files

Now all that remains is to place the downloaded theme in the desired directory in Windows.
How to add a theme in Windows 7
Step 1. Download the theme you like. Click “More details”.

A separate topic page will open. On the right there is a "Download" button.

Note! If you can’t download the theme using the first button, try Yandex. Disk"
The downloaded archive is opened using WinRar.


Then open “C:” - “Windows” - “Resources” - “Themes” and move the theme files to this folder.


Step 2. Examination. Go to “Personalization”. Right-click on the desktop and select “Personalization” at the bottom.

If you follow the instructions and follow the steps correctly, you will get the result - the installed theme will be displayed in the window.
Step 3. Click on the topic. We wait a few seconds. Ready! The photo shows an example of the installed “Mac White” theme.

How to change the start button in Windows 7
If you want to radically transform the Windows interface, you can customize Start.
“Start” is linked to the Explorer file (explorer.exe). Therefore, to transform the skin you will need rights to the file. The Takeownershipex utility helps solve the problem.
Method 1. Download the program. Go to the website 7themes.su. In the menu, select “Miscellaneous”, then “Start Buttons”.

Then click the “Installation Instructions” button.


It will help us get access rights to the explorer.exe file.

Method 2. Download Windows 7 Start Button Changer. It is designed to change the button skin. You can download it from the “Installation Instructions” page described in method 1.

All that remains is to select the line “Select & Change Start Button” in the program.

In the explorer that opens after clicking, look for the downloaded skin.

Ready-made skins are available on the sites described in the article.
Where are the installed Windows 7 themes located?
All themes are located in the folder “C:” - “Windows” - “Resources” - “Themes”. "C:" is the name of the drive where your system is installed. It may be different. The main thing is to find the folder with “Windows”.

Where are the default themes in Windows 7?
In the same folder where you installed them personally: “C:” - “Windows” - “Resources” - “Themes”.
How to delete topics?
Simply delete the theme files from the “Resources” - “Themes” folder.
“Installing the theme for Windows 7 Home Basic and Windows 7 Starter.” Unfortunately, in these editions of operating systems there is no “Personalization” item. If you right-click on the desktop you will not see it. But the problem can be solved. The Personalization Panel utility will come in handy.
- Download the program. We go to the website Oformi.net. In the menu we find “Miscellaneous”, in the drop-down list select “Programs”.

- Then click on the “Sort by popularity” item.

- Scroll down a little and find the program you need.

- Let's launch the utility. Select “Typical installation”. Click “Next”.

- Examination. Go to “Personalization”. Right-click on the desktop and select the bottom line of the menu.

- A window with themes opens.


How to update Direct X: improvements for gamers
In order for the system to support skins and smooth operation of games, it is recommended to regularly update DirectX. This is done in three steps.
Step 1. Find out the current version of DirectX. Open the Start menu and select Run. Or use hot keys (press Ctrl+R keys at the same time).

In the program that opens, enter the command “dxdiag.exe” into the text field.

Click “OK” and an information summary about the system appears. Find the line “DirectX Version”.

Step 2. Download the program from the official Microsoft portal: https://www.microsoft.com/ru-ru/download/confirmation.aspx?id=35
Step 3. We install the program by simply following the installation instructions.

Note! Uncheck "Install Bing Bar" if you don't need this add-on in your browser.
We are glad that our article helped you decorate Windows and make the system irresistible. Thanks for reading!
Video - How to install a theme on Windows 7
Universal Theme Patcher is a free utility designed to change some system files of the Windows 7/Vista/XP operating system!
Thanks to this patch, you can easily install any theme.
Such themes most often have the format .msstyles (sometimes .theme, but less often) and they must be copied to the folder with OS Windows themes (C:WindowsResourcesThemes). After this, you just need to double-click on such a file with the mouse - and the design theme will change, without any additional programs.
Patched files can be restored by running the patch again and clicking on the corresponding buttons. Universal Theme Patcher is suitable for both 32-bit and 64-bit architectures for the following versions of Windows: 7, Server 2008, Vista SP1/SP2, Server 2003, XP SP2/SP3.
There is nothing complicated in working with the program; installation is simple and intuitive.
The downloaded program must be extracted from the archive and run UniversalThemePatcher, always with administrator rights.
Select a language, preferably the great and mighty one, and click on “OK”
A window opens with information about the installed system and the necessary files.
Click “Yes” to continue and see a window where it will be shown which files we need to patch.

They are different on each system, but Universal Theme Patcher will independently select exactly those that need to be patched. Click the “Patch” button next to each file in turn.
When all the necessary files are patched, Universal Theme Patcher will ask you to restart your computer.

After reboot, you can install third-party themes, whether you have Windows 7, Windows Vista or Windows XP
Operating systems of the Windows family offer their users great opportunities for designing the appearance of the OS. Various color schemes, styles, sets of buttons, options for windows and panels, as well as everyone’s favorite themes have long been invented at the service of users. This has been implemented on a particularly large scale in the two latest releases from Microsoft - “Seven” and “Eight”.
Despite the fact that many things in Windows operating systems are learned almost intuitively and are done quite simply, many users still face serious difficulties in how to do this or that thing. And installing themes is no exception! Let's take a closer look at it.
Installing official themes in Windows 7
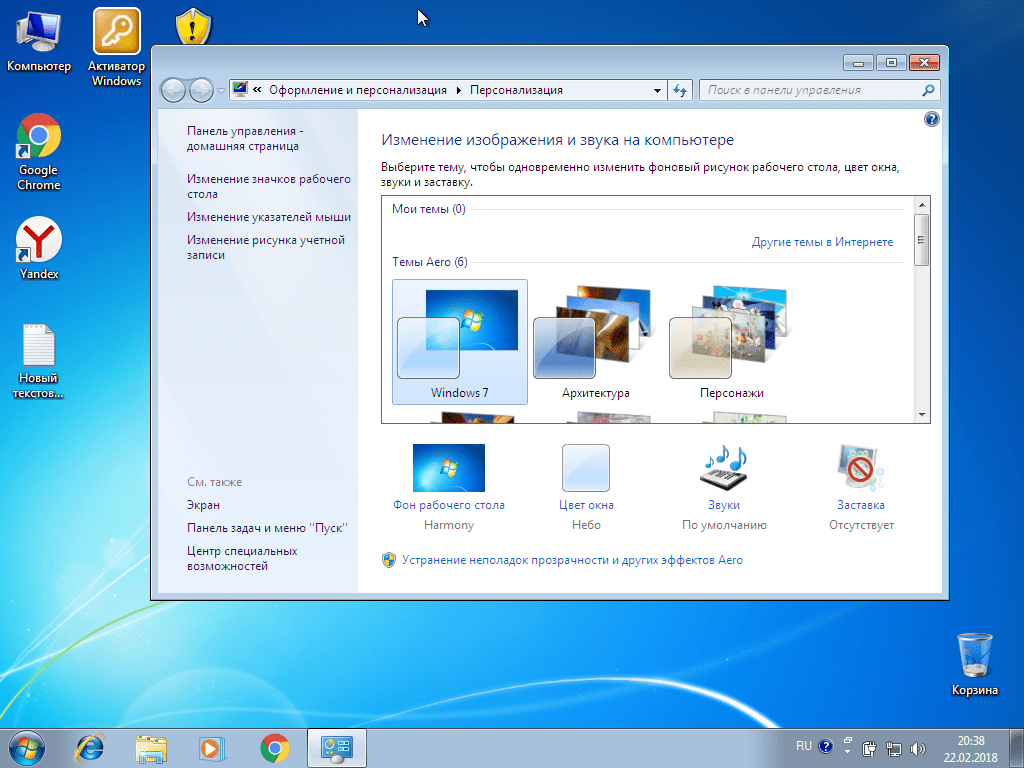
First, click on an empty/free space. table right keyboard mouse and call the option "Personalization".
This way you will instantly be in registration service Windows. As you can see, there, in two sections, the system already offers a wide variety of topics to choose from, both in “aero” and “basic” (simplified) versions. Select any of them by clicking on it with the mouse, and it will be automatically installed immediately.


If you want something “new” or different, then to download additional official themes, use the option "Other Internet Topics".

By clicking on it you will instantly be taken to official microsoft portal, where you can choose and download many beautiful themes for design. Take advantage search bar and categories to find something faster. The site also has a function for viewing each topic so that you can clearly see what you are going to download.

After downloading the theme you like, find its file on your computer (by default it will be in the folder "Downloads") and launch it by double-clicking the mouse.

The theme will also be installed automatically and appear in "Design and personalization" In chapter "My themes".

Installing third-party (unofficial) themes in Windows 7
It’s hard to disagree with the fact that today the Internet is full of beautiful custom themes that, unfortunately, cannot be installed in Windows using the usual method. This problem can be solved using special utilities, for example, VistaGlazz, which will patch system files and thereby make it possible to install third-party themes.
To get started, download the latest version of VistaGlazz and install it on your PC. There is nothing super complicated here. Simply, run the installer file from them administrator and follow the installer's further instructions.

After VG will be installed, launch it from the “working” shortcut or from the menu "Start" and press the button "I agree" to start using it.

Click on the icon "Computer with white shield", then, on the button "Patch files" to begin the process of patching system files.


After finishing, click on "Reboot" to reboot the machine. Then all the changes made VistaGlazz will take effect.

After restarting the OS, run the program again and make sure everything went well. A green shield should now appear on the “Computer” icon!

That's it, now you can start installing themes!

After that, open "Design and personalization" and look - the topic should be displayed there, in the section "My themes".

That's all. Now you will no longer have problems installing official and proprietary themes in Win7!