By converting a file to another file extension, you can use other programs to service it. But we should not forget that the TIB file, after conversion to VMDK, may differ slightly from the original, for example in the placement of data. The most important information should be preserved, but if you are interested in the file being identical after converting from TIB to VMDK, you should use your judgment and select the appropriate application from the list below. This doesn't guarantee that the conversion will be 100% as expected, but it can still help a lot. If, nevertheless, the effect of converting the TIB file to VMDK did not meet your expectations, you can try to find on the Internet another version of your file in the TIB format, previously correctly converted by someone else into a VMDK file. If this does not work for you, use the information presented in the next section.
Programs for converting TIB to VMDK:
Other possible TIB file conversions
If after converting the TIB file you do not get the appropriate result, you can try changing the TIB file format to something other than VMDK. On our website you will also find information about the following conversion options:
Converting a file with the TIB extension to another format
What other possibilities are there?
Unfortunately, if after performing the two previously described steps (trying to find your TIB files converted by someone else, and trying to convert it yourself to the VMDK format), there is still a problem with the file, then there are few solutions left. You can try again to find and install an application that can open the TIB file in its original format (without converting to a VMDK file. This solution will be difficult to implement, but will undoubtedly give the best result.
For companies implementing virtualization, the issue of transferring their servers to a virtual environment is relevant. The official method is to use VMware converter (link). But in my practice, migrating at least one (or more) OS through a converter always ends in failure. Moreover, a system that does not migrate is officially supported by VMware and is mentioned in the documentation.
VMware vCenter Converter Standalone functionality:
- Converting an operating system installed on a physical server into a virtual machine for ESXi
- Converting a virtual machine from ESXi to a virtual machine for ESXi latest version
- Converting a Data Protection backup file into a virtual machine for ESXi
- Converting virtual machines from Hyper-V to a virtual machine for ESXi
- Converting an Acronis backup (.tib) into a virtual machine for ESXi
- Converting from a Sumantec backup (.sv2i) to a virtual machine for ESXi
- and other formats into a virtual machine for ESXi
Conversion using the usual method
1
We install VMware converter on the network, most reliably on the machine that needs to be converted.
2
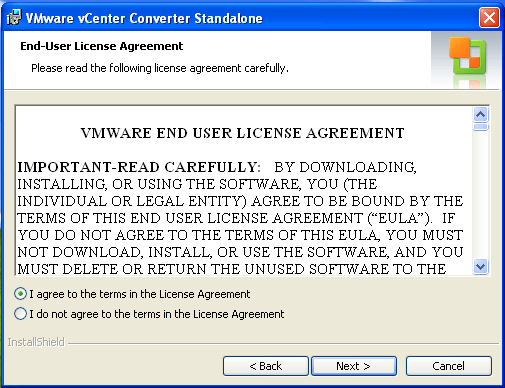
We agree with the licensing policy.
3

VMware converter installation folder
4

Two types of program operation. Local installation into the operating system that needs to be converted, or a client-server option, when the VMware converter agent is remotely installed on the OS, and the server part is located, for example, on the administrator’s computer.
5
6

You must indicate the source (what needs to be converted).
7

The program determines the local machine itself and quite accurately.
8

Now we choose where to create a new virtual machine.
9

Specify the ESXi or vCenter server address.
10

The converter connects to VMware ESXi.
11

Specify the name of the virtual machine that will be created on VMware ESXi
12

We indicate on which LUN the virtual machine files will be placed. And hardware version (version 8 for ESXi 5+)
13

At this step of the wizard, you can specify the conversion settings more precisely. For example, select the disks that need to be transferred, the virtual network, and more.
14

Since the conversion takes place from a running operating system and the data may change during the transfer, you can configure post synchronization, which will occur after the main conversion.
15
 FAILED. Therefore, a more reliable way is to first make a backup copy using an Acronis boot disk, and then convert a virtual machine from it. The Acronis Boot CD image can be downloaded.
The transfer procedure is as follows:
- Stop the server that needs to be transferred.
- Boot this server from Acronis Boot CD
- Make a current backup copy, get a .tib file
- Launch VMware Converter and feed it the .tib file
- Otherwise, everything is the same as the transfer using the usual method.
You can do without a converter at all, and manually create a new virtual machine, boot from Acronis Boot CD and restore information from a backup copy, but you risk seeing a BSOD, because VMware Converter can insert the necessary drivers into the virtual machine, but Acronis cannot.
Acronis True Image 2010 backup (TIB) files can be converted to Windows backup VHD files. There are several reasons why Acronis recommends doing this:
- You can boot your machine from the converted VHD file to test if it is not corrupt and works fine;
- You can boot from the converted VHD for testing purposes. For example, to install a new application and see if it runs fine;
- You can keep the converted VHD file for emergency situations. For example, if your machine crashes and you need to get it up and running in no time, you can just boot from the VHD file.
- In Windows 7, the VHD file can be mounted as an additional drive.
(!) If you are going to boot from the converted VHD file, it must contain either Windows 7 Ultimate or Windows 7 Enterprise Edition.
(!) If you are going to mount the VHD file in Windows 7, there can be non-system Windows partitions.
(!) Any changes you make to the booted or mounted VHD file are saved to it. If you boot from the VHD file and make changes to the data that was not backed up (e.g. delete a file from drive that was not backed up), these changes will affect your live system.
(!) File backup (as opposed to disk/partition backup) cannot be converted to VHD.
(!) You can only boot the same machine the backup of which was converted to VHD. Booting other machines from the same VHD files will fail.
(!) You cannot run the converted VHD file as a virtual machine.
Have you ever encountered the desire to use a system that you made a copy of using Acronis in a virtual machine? There are times when completely destroying the current system is not always convenient. But the file with the system image stubbornly refuses to be mounted in any virtual machine.
There is a way out; to mount the Acronis image into a virtual machine you will need:
- Acronis True Image;
- StarWind V2V Image Converter;
- VMware Workstation.
You already have an image or several parts of it in the format .tib, which contains the system snapshot you need. Install Acronis True Image, the version for working on the system, not the boot version! Let me make a reservation right away: it’s paid, you can try the trial version, you can purchase it, or just steal it - it’s up to you.
Open True Image and go to the section Tools and Utilities- Convert Acronis backup

I used Acronis True Image 2013 with a localizer installed on top; in other versions the location may be different, but in general this function is present.
Here you select your copy of the system, indicate the path where the converted system should go. If your cast consists of several parts, do not despair, specify the last part and the program will pick up all the parts that were there before.
You received the image in the format .vhd. But it also cannot be used in your virtual machine. Now you will need the StarWind V2V Image Converter utility, it is free and can be downloaded from.
Select the storage location for your vhd image and convert it to VMWare growable image(I recommend). The process will be long, and the speed of transcoding will depend on the file size and the power of your computer.
And finally you got the coveted image .vmdk, now it is one, regardless of how many parts there were initially. It is this image that will be subsequently mounted into the virtual machine.
Create new virtual machine in VMware Workstation, select custom installation, indicate the version of the OS, RAM and kernels you will allocate for it, do not forget to indicate in the system installation selection menu that you install the system later and what you want select existing hard drive. (see screenshots below) When specifying an existing image, you may be asked to transfer the image to a newer format; I recommend not to do this, since the system does not always remain operational after this. I used VMware Workstation 9.0 with localization.

VirtualBox- a special program for creating virtual computers in PC memory. Each virtual computer can contain an arbitrary set of virtual devices and a separate operating system. The scope of application of virtual computers is very wide - from performing software testing functions to creating entire networks that are easy to scale, distribute the load and protect. VirtualBox distributed free of charge, open source.
1) Download the latest version of the program VirtualBox from the official website: http://www.virtualbox.org/wiki/Downloads
2) Install it on your computer.
2.1) Run the installer; In the first window, click Next
2.2) Select item I accept the terms in the License Agreement and press Next.
2.3) Click Next, then again Next
2.4) Click on the button Yes. Attention: In the next step, after clicking the Install button, the connection with the network (both local and Internet) will be disconnected.
2.5) Click Install to continue installation
2.6) In pop-up windows Install software for this device? click on the button Install
2.7) In the last window, leave the checkbox to start creating a virtual machine immediately or uncheck the checkbox to create a virtual machine later. Click the button Finish. If you uncheck the box, use the icon on the desktop to launch the program.
3) In the main program window, click on the button Create. Will open New Virtual Machine Wizard. Click the button Further.
4) Enter the name of the virtual machine, in the OS Type section set the values:
Operating system: Microsoft Windows
Version: Windows 7.
5) Enter the amount of RAM allocated to the virtual machine.
Attention: Memory will be allocated from the physical memory installed on your computer.
Do not install memory below 512 Megabytes or above 50% of the installed physical memory size. Click the button Further.
6) Select the boot virtual hard disk. Set the radio button to: Create a new hard drive. Click the button Further.

7) Will open New Virtual Disk Wizard. Click the button Further.
8) Select the virtual hard disk type. The dynamic image will initially take up little space and will expand gradually. A fixed image will immediately create a disk of the specified size - this may take a long time. Click the button Further.

9) Select a name and location for your virtual disk file. By default, the file name matches the name of the virtual machine, and the file itself is located on the same hard drive where the real Windows 7 is installed, in the C:\Users\UserName\.VirtualBox folder.
Select the virtual hard disk size. (Default 20 Gigabytes). Click the button Further.

10) Click on the button Ready and you will return to the previous window, where the parameters of the virtual machine you are creating will be indicated. Click on the button Ready in the window Bottom line, and you will create a new virtual machine.
A virtual machine for installing Windows 7 on it has been created.

11) Before you start installing Windows 7 on your virtual machine, you need to configure it. To configure your virtual machine, click on the button Properties.
12) In the settings section, from the list on the left, select Display. Set the size of video memory available for the virtual machine to at least 26 Megabytes. Check the boxes for settings items Enable 3D acceleration And Enable 2D video acceleration.

13) In the settings section, from the list on the left, select Carriers.
14) In the settings tree Information carriers select the DVD disc icon.
If you have a Windows 7 installation disk on a DVD, then insert it into the DVD drive and in the column Attributes opposite the element Drive unit select it from the drop-down list. Also check the box for Allow direct access.
If you have a Windows 7 installation disk in the form of an ISO image, then in the column Attributes click on the folder icon to open
15) In the window Virtual Media Manager click the button Add. Select the image file and click Open. Click on the button Choose

16) Your image will be added to the settings tree Information carriers, following the virtual hard disk file.
Converting a TIB to VHD file
Click the button OK.

17) You will find yourself in the main program window. Click on the button Start
18) If information windows appear, click on the button in them OK
19) Click inside the virtual machine screen, and in the information window click on the button Capture
20) Install Windows 7. Installing Windows 7 on a virtual machine is no different from a regular installation on a real machine.
21) After installing Windows 7 on the virtual machine, VirtualBox will immediately launch Windows 7 inside the virtual machine.
22) Using the mouse and keyboard in a virtual machine blocks them from being used in real (host) Windows.
To switch between the virtual machine window and the main Windows window, you have to use the Right Control host key.
So that the virtual machine does not capture the mouse cursor and keyboard, and you can easily move the mouse cursor between the guest (virtual) and host (main) systems, and the clipboard becomes shared, you need to install Guest OS Additions. To install them, do the following: in the menu of the running virtual machine, select Devices -> Install Guest OS Additions

23) In a pop-up window Autostart Click VBoxWindowsAdditions.exe and install the program.
24) To shut down a virtual machine, in the menu of the running virtual machine, select Car -> Close -> Turn off the car.
25) To launch the installed Windows 7 in the main program window, click on the button Start.

In particular, the UK authorities are heavily dependent on Windows 7, despite the OS approaching the end of its life
Windows 7 will reach the end of its lifecycle on January 14, 2020, and just as it does when any operating system ends support, devices in use must be updated to a newer version to continue receiving updates and security patches.
As far as UK authorities and bureaucrats are concerned, it's hardly a priority, as 17% of them weren't even planning on upgrading to Windows 10.
The data was provided by Cloudhouse in response to a Freedom of Information (FOIA) request made to 317 councils in the UK.
Application compatibility issues
Only 1% of city councils have actually completed the upgrade to Windows 10, and 40% of those who responded said the inability to move older apps to a newer version of Windows is the main reason for the upgrade delay.
Application compatibility issues were one of the biggest disadvantages that companies running Windows XP faced, as migrating to a new operating system when support for that version ended required more than just installing a different version of Windows.
How to convert TIB to VHD?
Additionally, a hardware upgrade was also necessary as part of the transition from Windows XP to Windows 7/8.1, although it is not the case that the upgrade is as critical from Windows 7 to Windows 10 given similar requirements.
At least 35% of councils said that migrating to a new version of Windows typically takes about two years, meaning they should start migrating to Windows 10 as soon as possible in order to complete it by the time Windows 7 ends support. On the other hand, 40 % said they expect the upgrade to be completed within a year.
Currently, Windows 7 is the world's desktop operating system with over 40% market share, followed by Windows 10 with about 32 percent. However, Windows 7 easily survived the onslaught of Windows 10, losing approximately 10% of market share after the latter OS debuted.
← Microsoft will give Windows 10 users access to collected telemetry data | One of the important bugs has been resolved by Microsoft →
Convert TIB to VHD
Converting a TIB file to a VHD is a process that changes the presentation of the data, not the data itself. Data conversion is a process performed for the needs of computer technology. We, as end users, are primarily interested in the contents of the file. Machines perceive data in files completely differently. They are not interested in the content, what is important to them is the appropriate form, or presentation of the data, so that they can decipher its content.
Although the final form of the data is a series of zeros and ones, it must be a series ordered in such a way that it is readable by a particular application or platform. Whenever data needs to be transferred further, it must be converted into a format readable for the next application - we are interested in the target VHD format. The data contained in the TIB file can be converted not only for the needs of the next application, but also for the purpose of transferring it to another computer system.
Export and import of data and manual conversion
Data conversion is usually a process, in certain cases mechanized.
How to create a VHD virtual hard disk file
The effect of the work of one program is automatically the input product of the next application (some applications provide an automatic opportunity to record the work done with the TIB file in the VHD format - EXPORT data) After exporting, we can use a simple method to carry out IMPORT this data into another application. If this is not possible, we can try to carry out the process of converting TIB to VHD ourselves. In order for the machine language to match, you must use the appropriate converter. You will find a list of programs for the conversion you are interested in at the top of this page. A file converter is a binary code translator that eliminates the difference in the code or carries out its correct translation so that another machine or program understands it. For us, as users, the only noticeable change will be a different file extension - VHD instead of TIB. For machines and programs, this is the difference between understanding the contents of a file and not being able to read it.
Mounting images in Acronis True Image Home 2011 as virtual media allows you to access them as if they were physical disks. This allows you to view images, copy selected files to your hard drive, and also edit a tib file.
To view a backup in Windows Explorer, simply click on the corresponding tib file. You can also right-click the file and select Browse from the context menu. In viewing mode, selected files can only be copied to the hard drive. When copying files from a previewed backup, the copied files lose the Compressed and Encrypted attributes.
To edit the corresponding tib file, you must be connected as virtual media. You can work with a virtual disk as with a real disk, that is, open, save, copy, move, create, delete files or folders. If necessary, you can attach a read-only image.
To launch the Mount Wizard, in the main program window, select Tools and Utilities > Mount Image.

Select a backup to connect to and click Next. If the archive is located in the Acronis Secure Zone, select Zone.
If the backup contains incremental archives, you can select one of the sequential incremental versions based on the date and time of creation.
Keep in mind that to connect the incremental version, you must have all previous versions of the backup and the original full backup.
3499: Converting TIB to VHD Files Using Acronis True Image Home 2010
If at least one of the sequential versions is missing, the connection will not be possible.
To connect a differential version of a backup, it is also necessary to have an initial full backup.
If the backup is password protected, you will be prompted to enter the password. No further operations will be possible until the correct password is entered.
If the image contains several partitions, then by default all of them will be selected for connection, and drive letters will be automatically assigned.

If you click the “Proceed” button, the image mounting operation will begin.
The connected image will be available for viewing, but will not be available for editing. To make the connected image available for editing, click “Options”.

Check the "Connect in read/write mode" checkbox. Click "Get Started." The local disk will appear in the My Computer folder.

You can work with files and folders as if they were located on a real disk.
To unmount a virtual disk, right-click the disk and select Unmount.

File backups, disk and partition images have the extension .tib by default, but only images can be mounted.
The image mounting operation is only available for FAT and NTFS file systems.
If the mounted image is modified, an incremental backup will be created and the changes will be saved.